Children’s Garden Gate Part 4


This is how the radish was forged. I started with a round piece of steel and I forged the leaf.


After reheating in the forge, I use the fly press to forge the root.


Later on I weld the radish on the gate to a bar that looks like the ground.


Here is some asparagus.


Here is a carrot in one of the posts. There is another vegetable on the gate that is a suprise for you to find.


In the world of iron vegetables it takes six suns to make them grow.


So I forge the heat into the suns.


Here’s one of the suns the gate post above a beet that’s growing there.


Two worms told me they hid this stamped design on the gate. Can you find it?

I thought I was finished with the gate when I took this picture.


But two red worms crawled out of the forge and asked me to add them to the gate.


Here’s one moving in some wet mud. I’m not sure where the other one crawled off to.


While the gate is being painted I clean up the shop. Next week I’ll install the gate in the garden.

Children’s Garden Gate Part 3


This is a scrolling jig I made to make multiple parts. It’s easy to make one scroll, but difficult to make many scrolls all the same size without a jig.


The ends of the bars will be tapered so they need to be heated bright yellow in the forge to become soft.


First the bar is hammered to a point


Then it’s bent around the scroll jig to make them all the same shape and size.


That was a lot of hammering but it feels good to see them all done.


The post parts that were cut by Water Jet Design on Lincoln Street came back to the studio so I made a jig and formed the bends in the top of the posts.


The bottom plate is cut to look like worms underground. The words in the top plate were inspired by the school motto; "Enter To Learn.” The scrolled parts that are welded under the "enter to grow" represent clouds with rain coming out of them..


Then everything is welded solid so water can't get inside the metal connections and rust.

Children’s Garden Gate Part 2


I enlarge the drafted design to full size and trace it to a piece of paper on the wall with charcoal. The anvil and blacksmith vice are watching the show while thinking about the fun they’ll have helping me make the gate.

Then I lay the paper on the floor and rub the backside to transfer the design.


The bars that will go in the middle of the gate are forged and twisted.


Then I lay them in their place in the pattern on the floor. These bars represent rain falling from the clouds to the earth.


Next thing I do is cut the straight bars and hammer texture on their edges. Then I start bending the curvy part of the design that represents the earth.


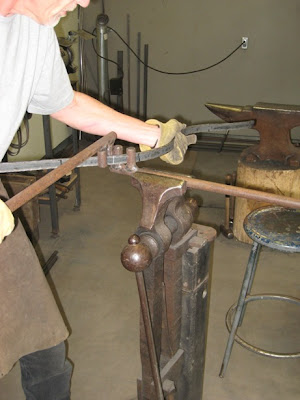
I use scroll benders to bend the steel bar to match the design on the floor.


The ends of the rain bars will be cut to fit the pattern and then everything will be tacked in place with an electric welder.